

 HANDS ON SharePoint
 HANDS ON Teams
 HANDS ON Lists
 HANDS ON tek
 M365 Admin
How to use a video background in Microsoft Teams meetings
Microsoft Teams allows you to define a picture to hide your background while in a meeting but unlike its main competitor Zoom, it doesn’t have support for short background videos yet.
Despite this limitation it doesn’t mean you are not able to use videos as background during your Microsoft Teams meetings, it is possible in just a few clicks as explained in this article.

To define a video as a background you will need to use 2 applications:
- Snap Camera – Used to add effects to the webcam capture, it also includes a virtual web cam that allows you to use the modified video as if it was coming directly from a real camera
- OBS – Is an open source streaming and recording platform that allows you easily create videos, it also includes a virtual web cam that in this scenario will be used as your main camera in the Teams meeting.
Create the video background effect
Before starting the video background process you will need to get booth applications installed, Snap Camera can be downloaded from here, and OBS from here.
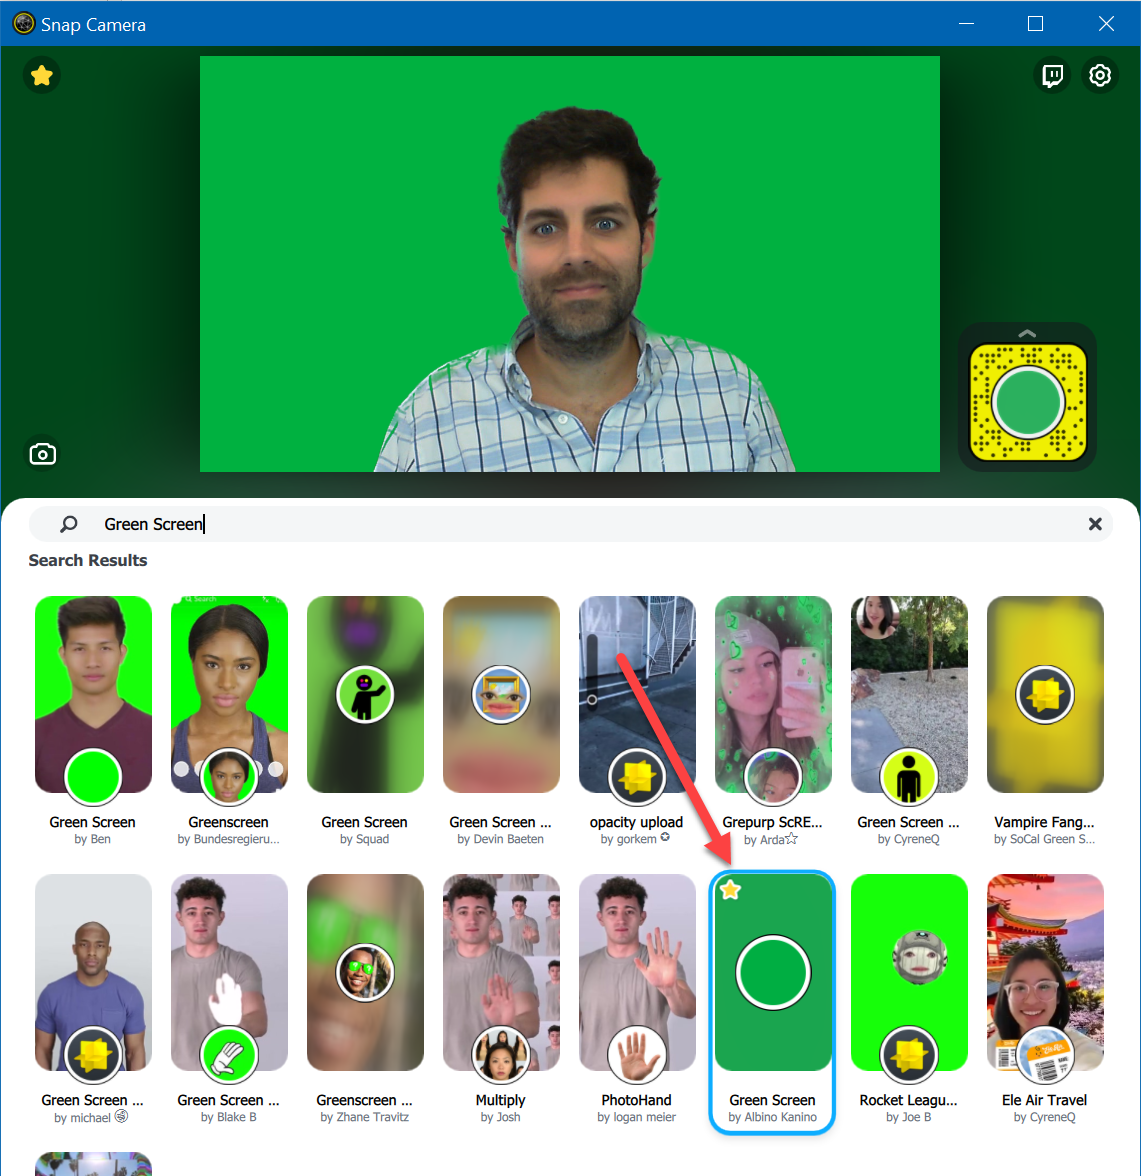
- Open Snap Camera and search for the effect Green Screen by Albino Kanino
- Once you find it click on it to apply the effect to your camera, the result must be similar to the following picture
- Leave the Snap Camera open and running in the background
- Open OBS and at the bottom of the window click in the + icon in the Scenes section to create a new scene
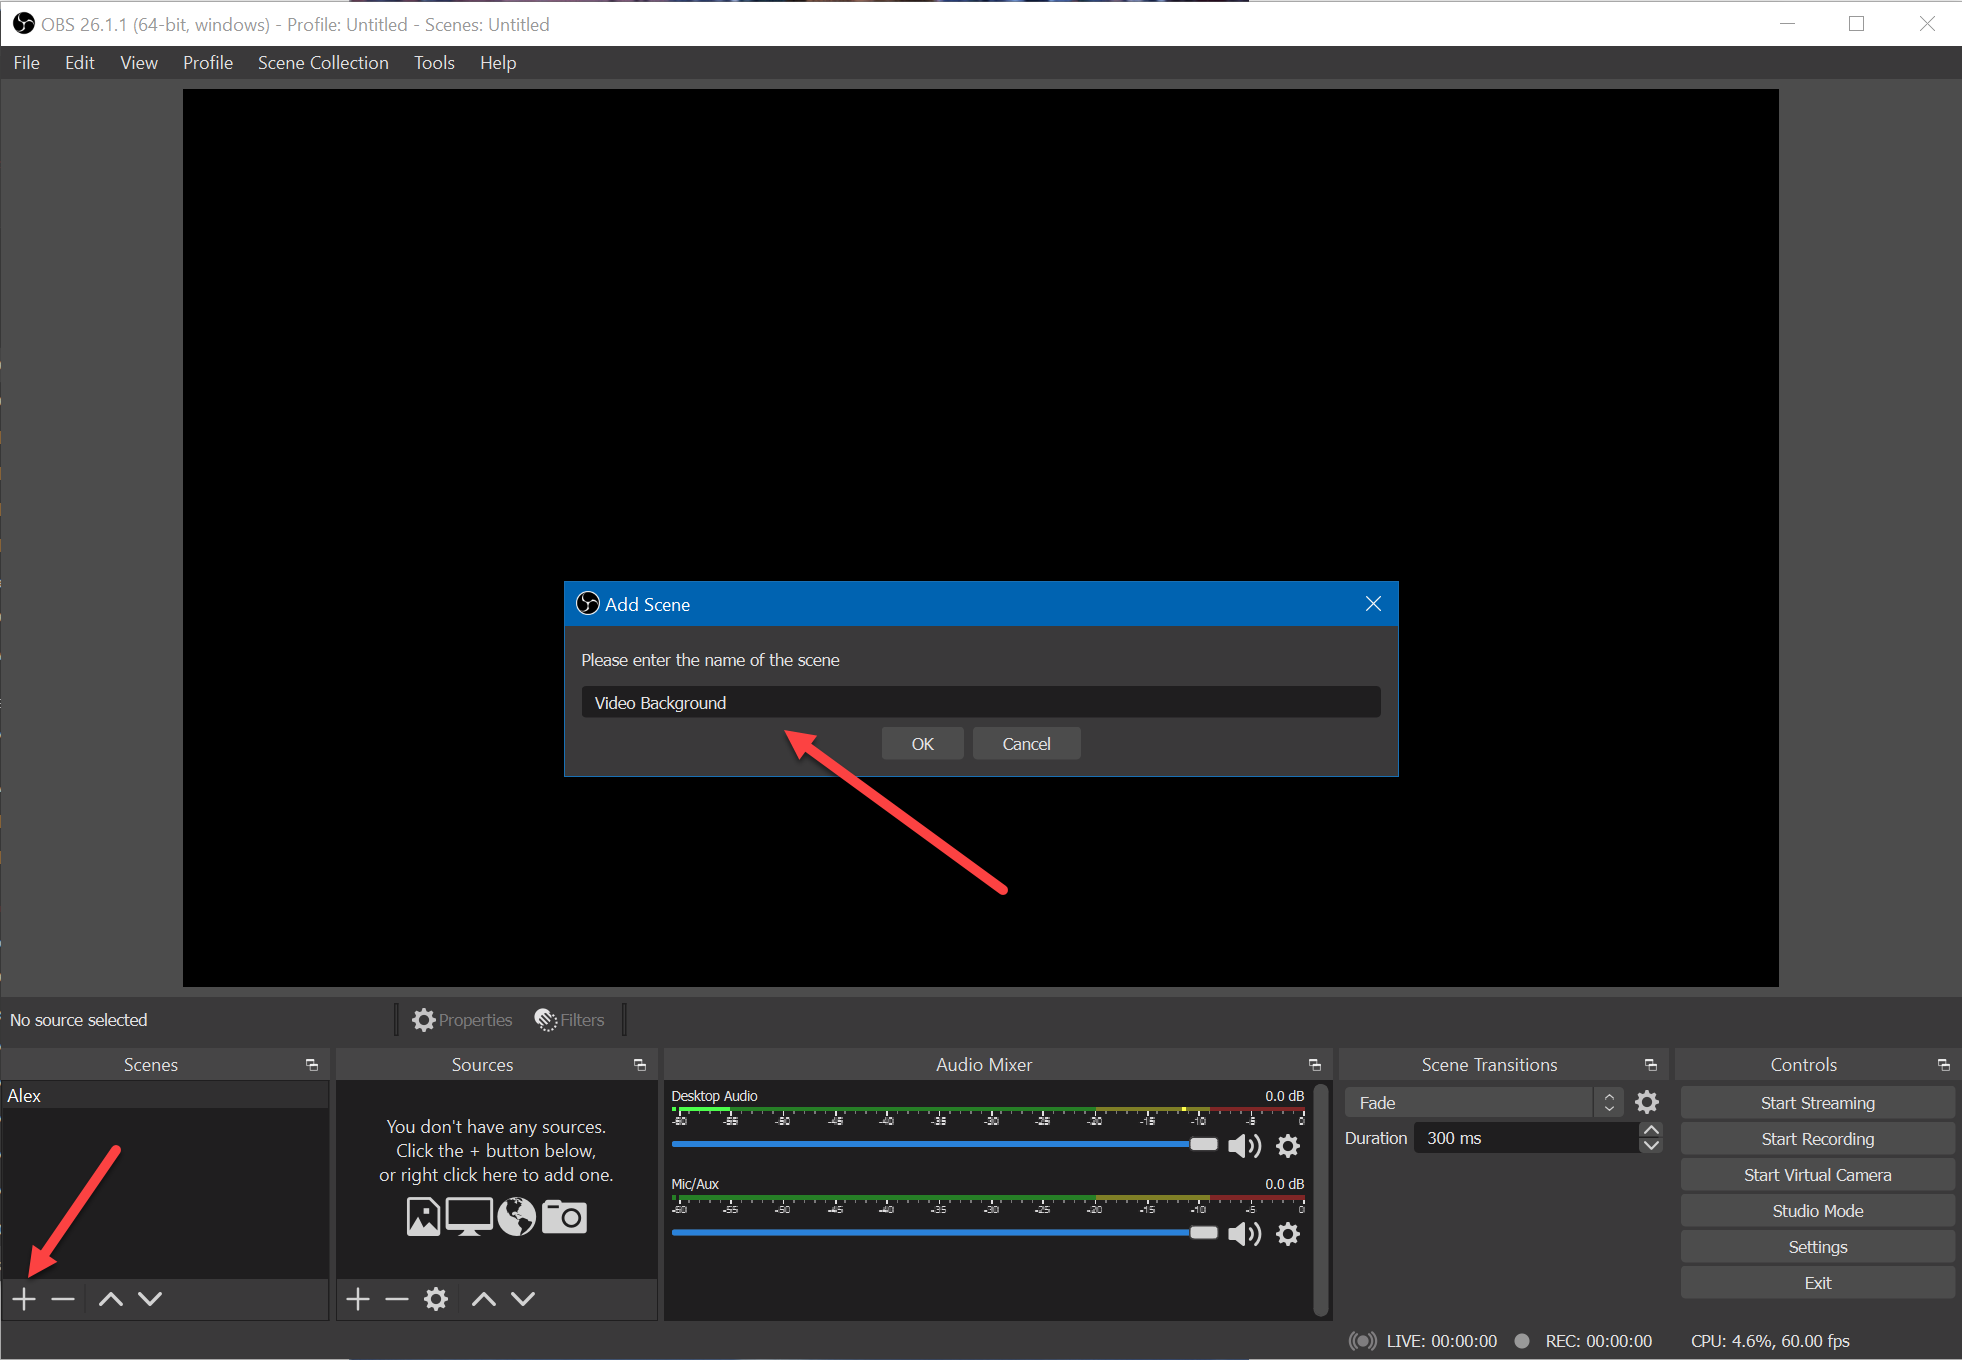
- Provide a name for it and click OK
- At the bottom of the window in the Sources pane click in the + icon and select Video Capture Device
- Create a new source by providing a new name for it and click OK
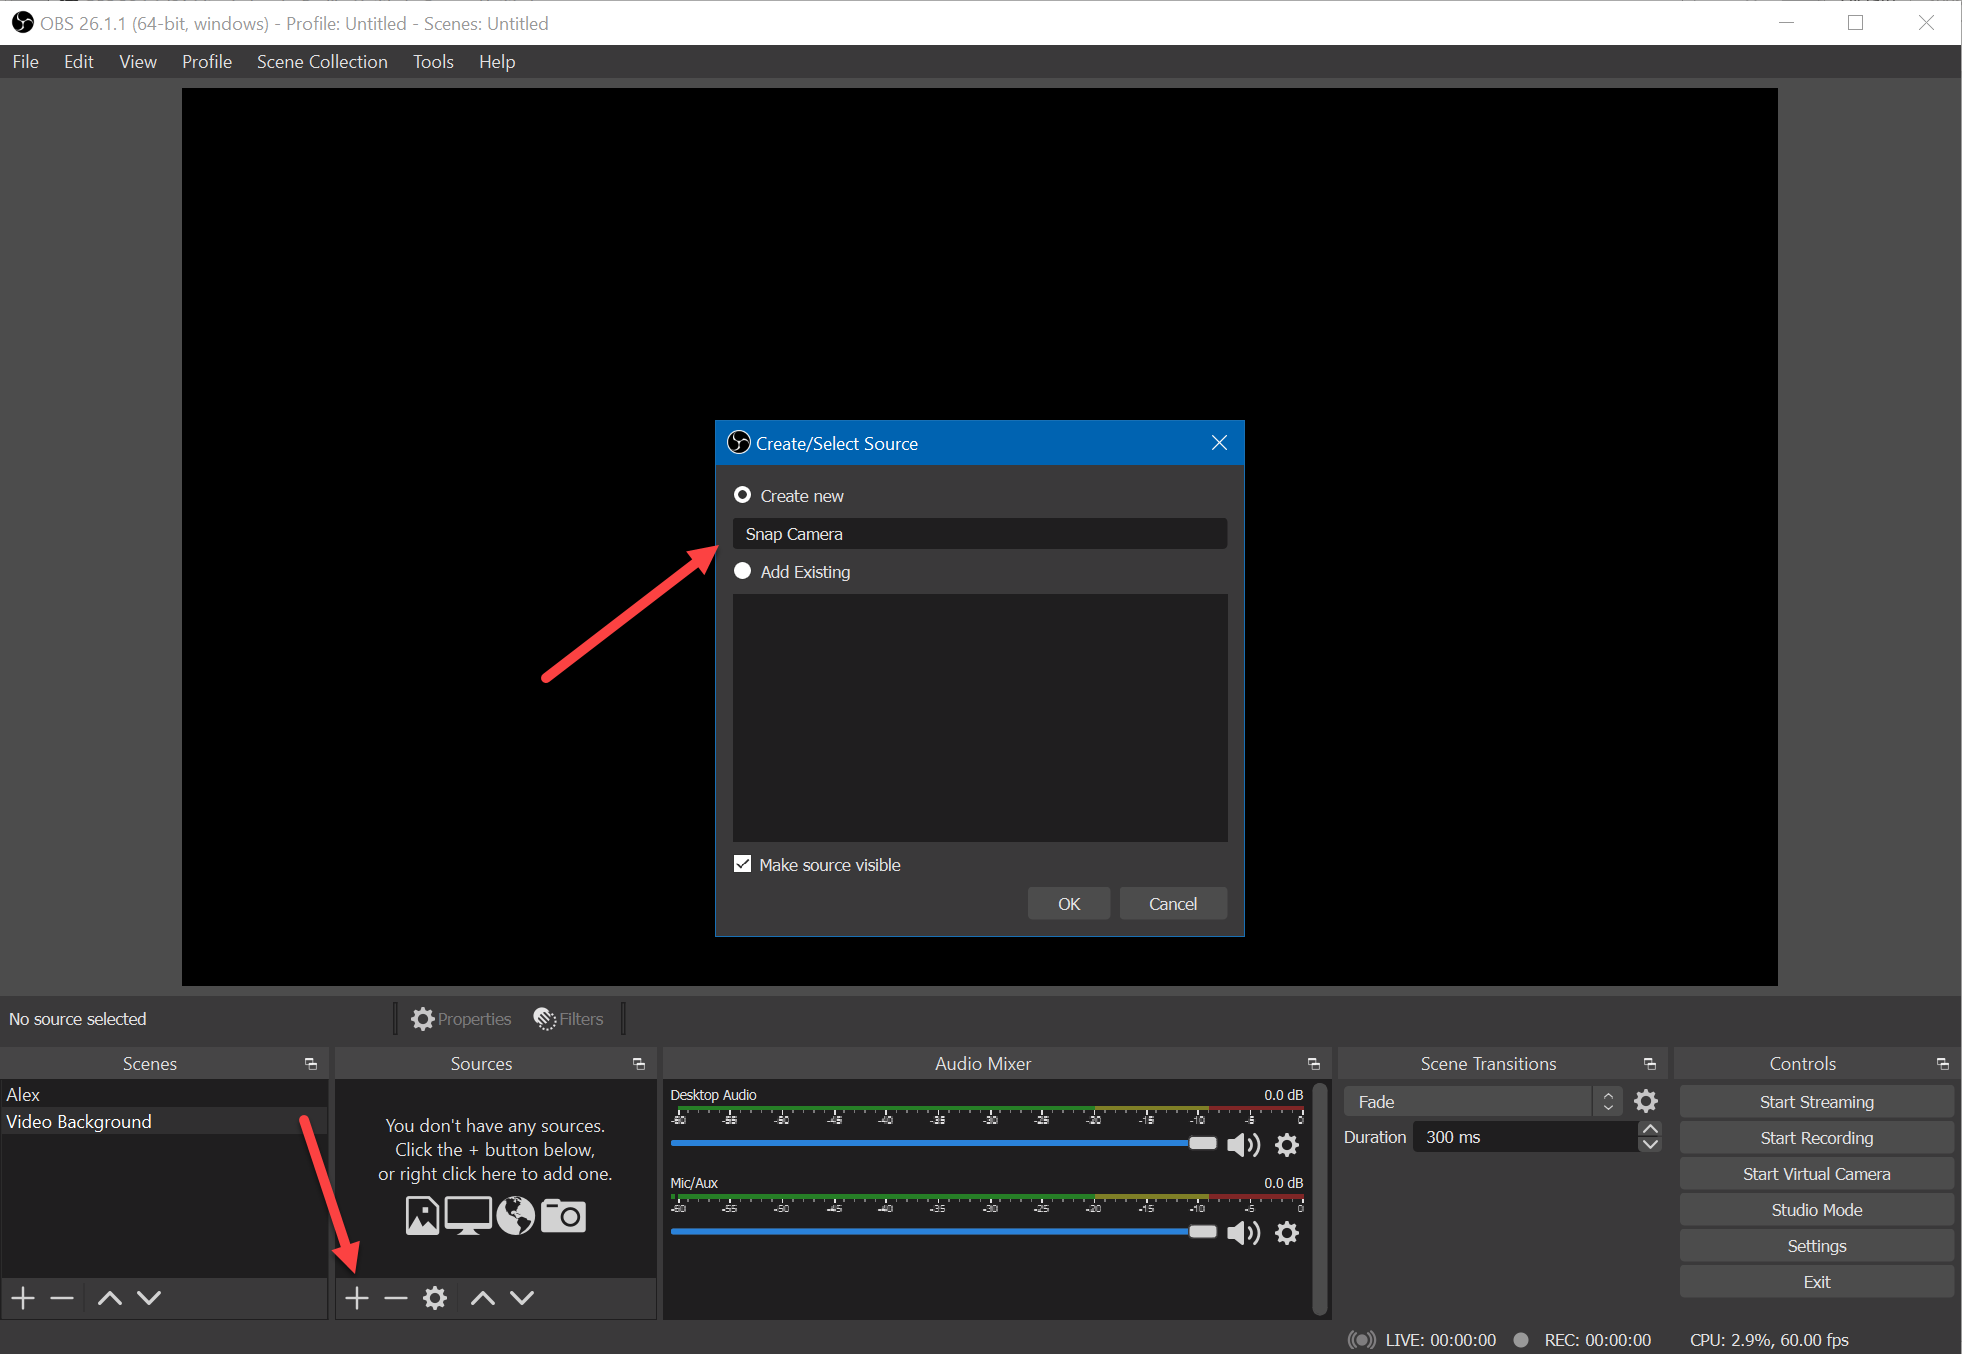
- Select Snap Camera in the device option and click OK
- Adjust the size of the video to use the entire scene
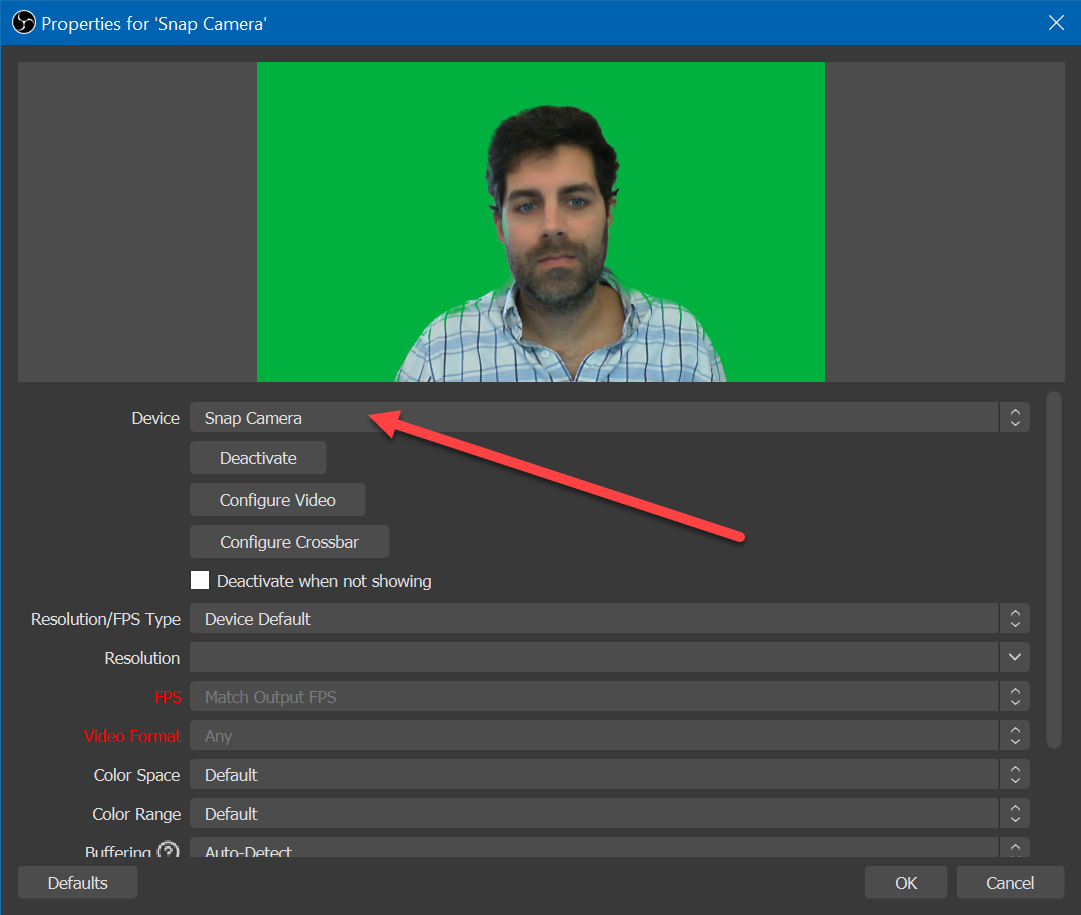
- Right click in the snap camera device and then choose Filters
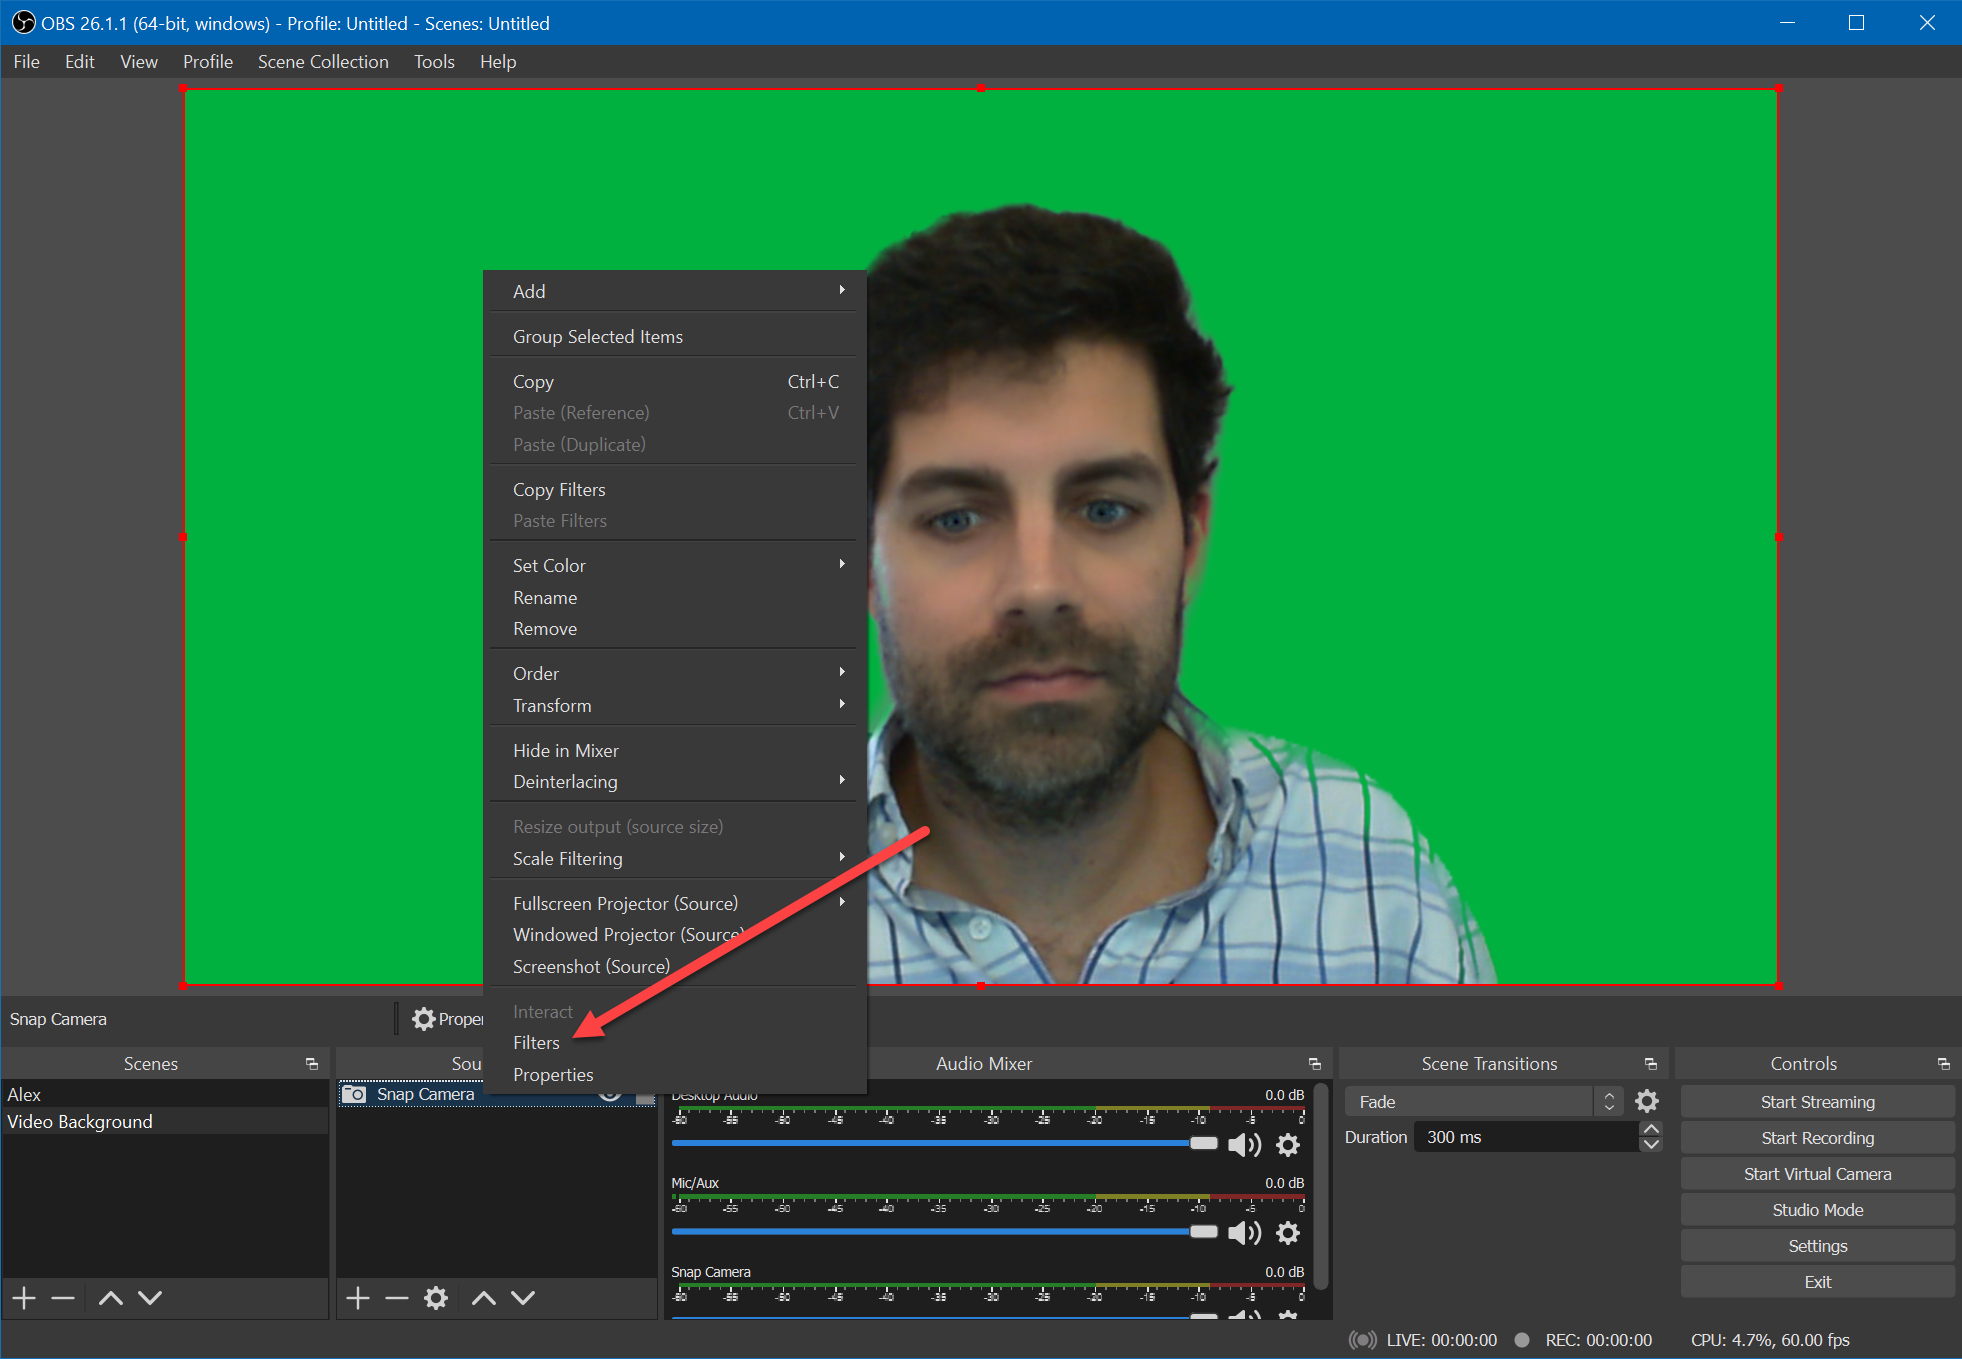
- Click in the + icon in the Effect Filters and select Chroma Key
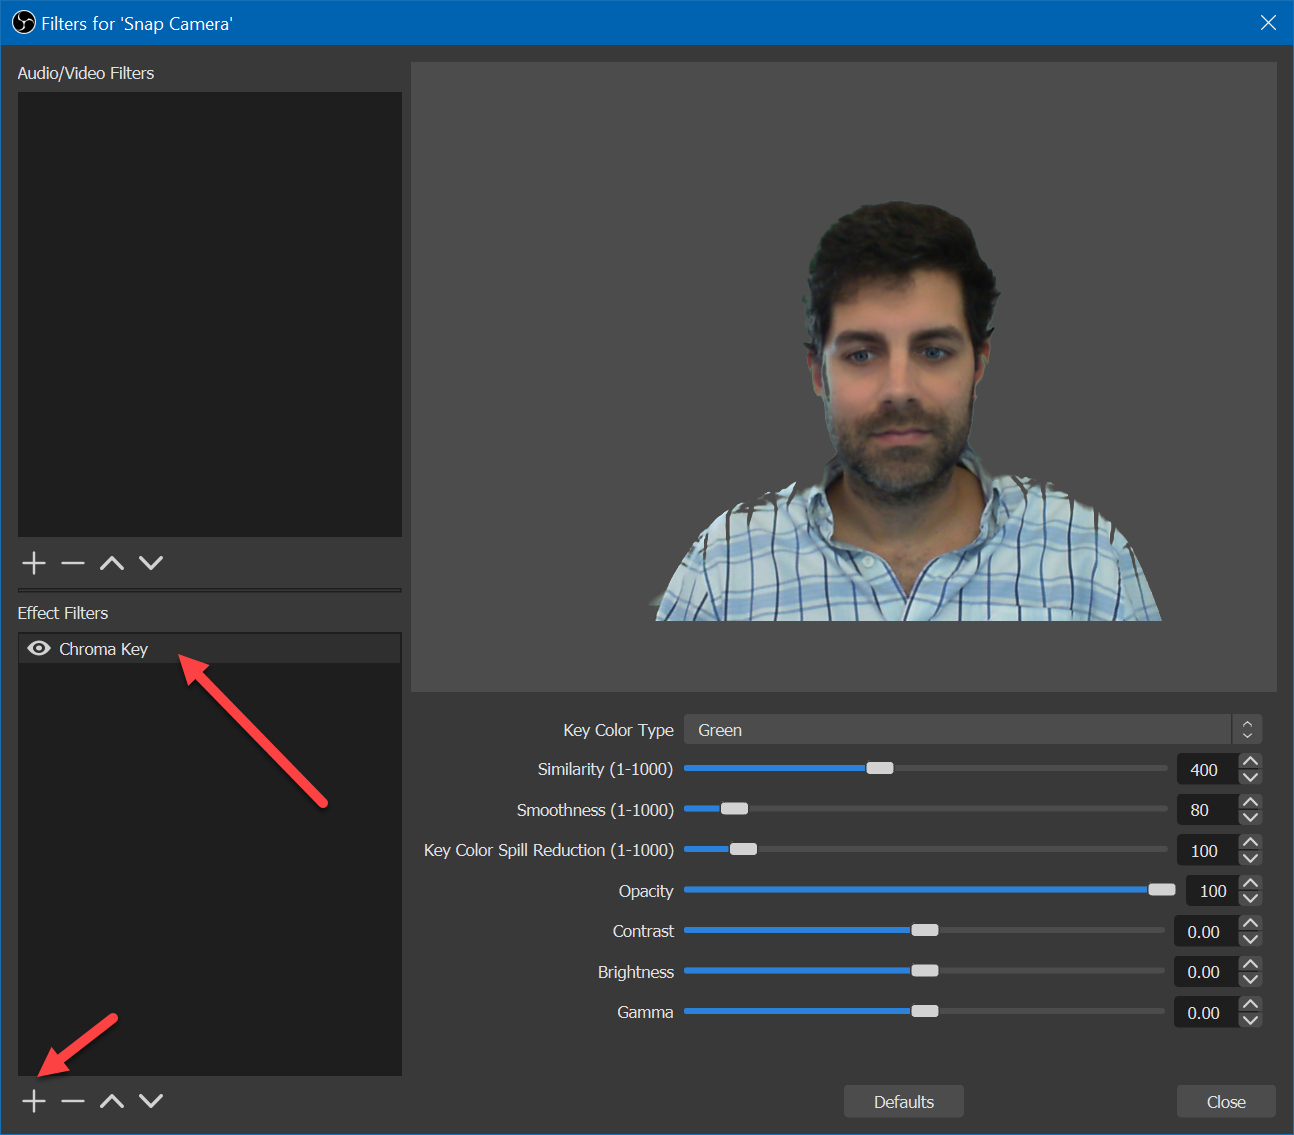
- The default values should be good to remove your background but you can adjust them if needed
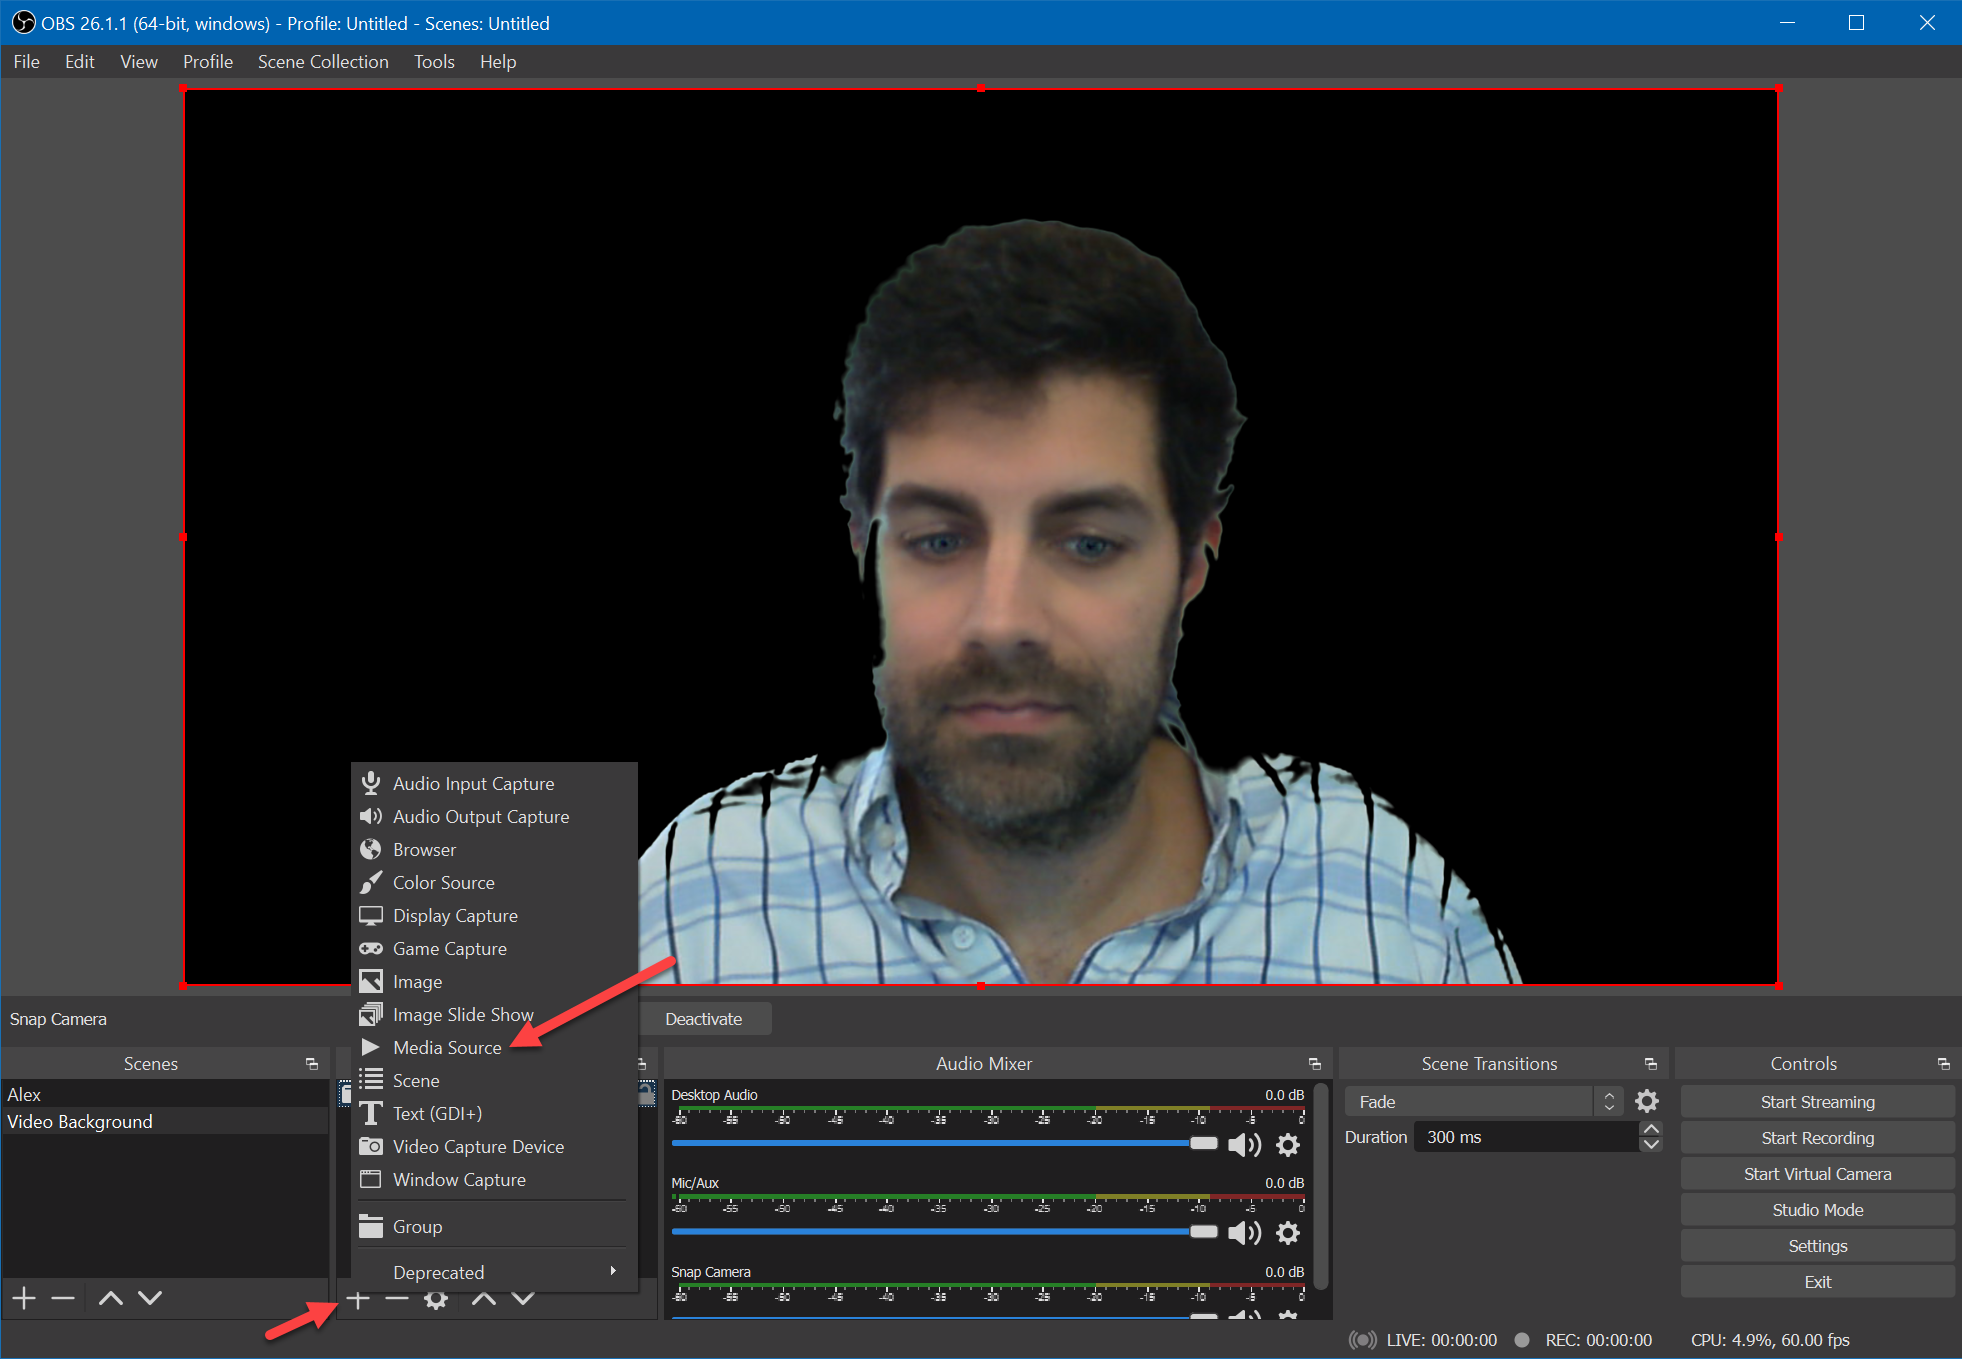
- In the Sources pane click again in the + icon and this tile select Media Source
- Provide a name to it and then select your video file
- Select the Loop option and click OK

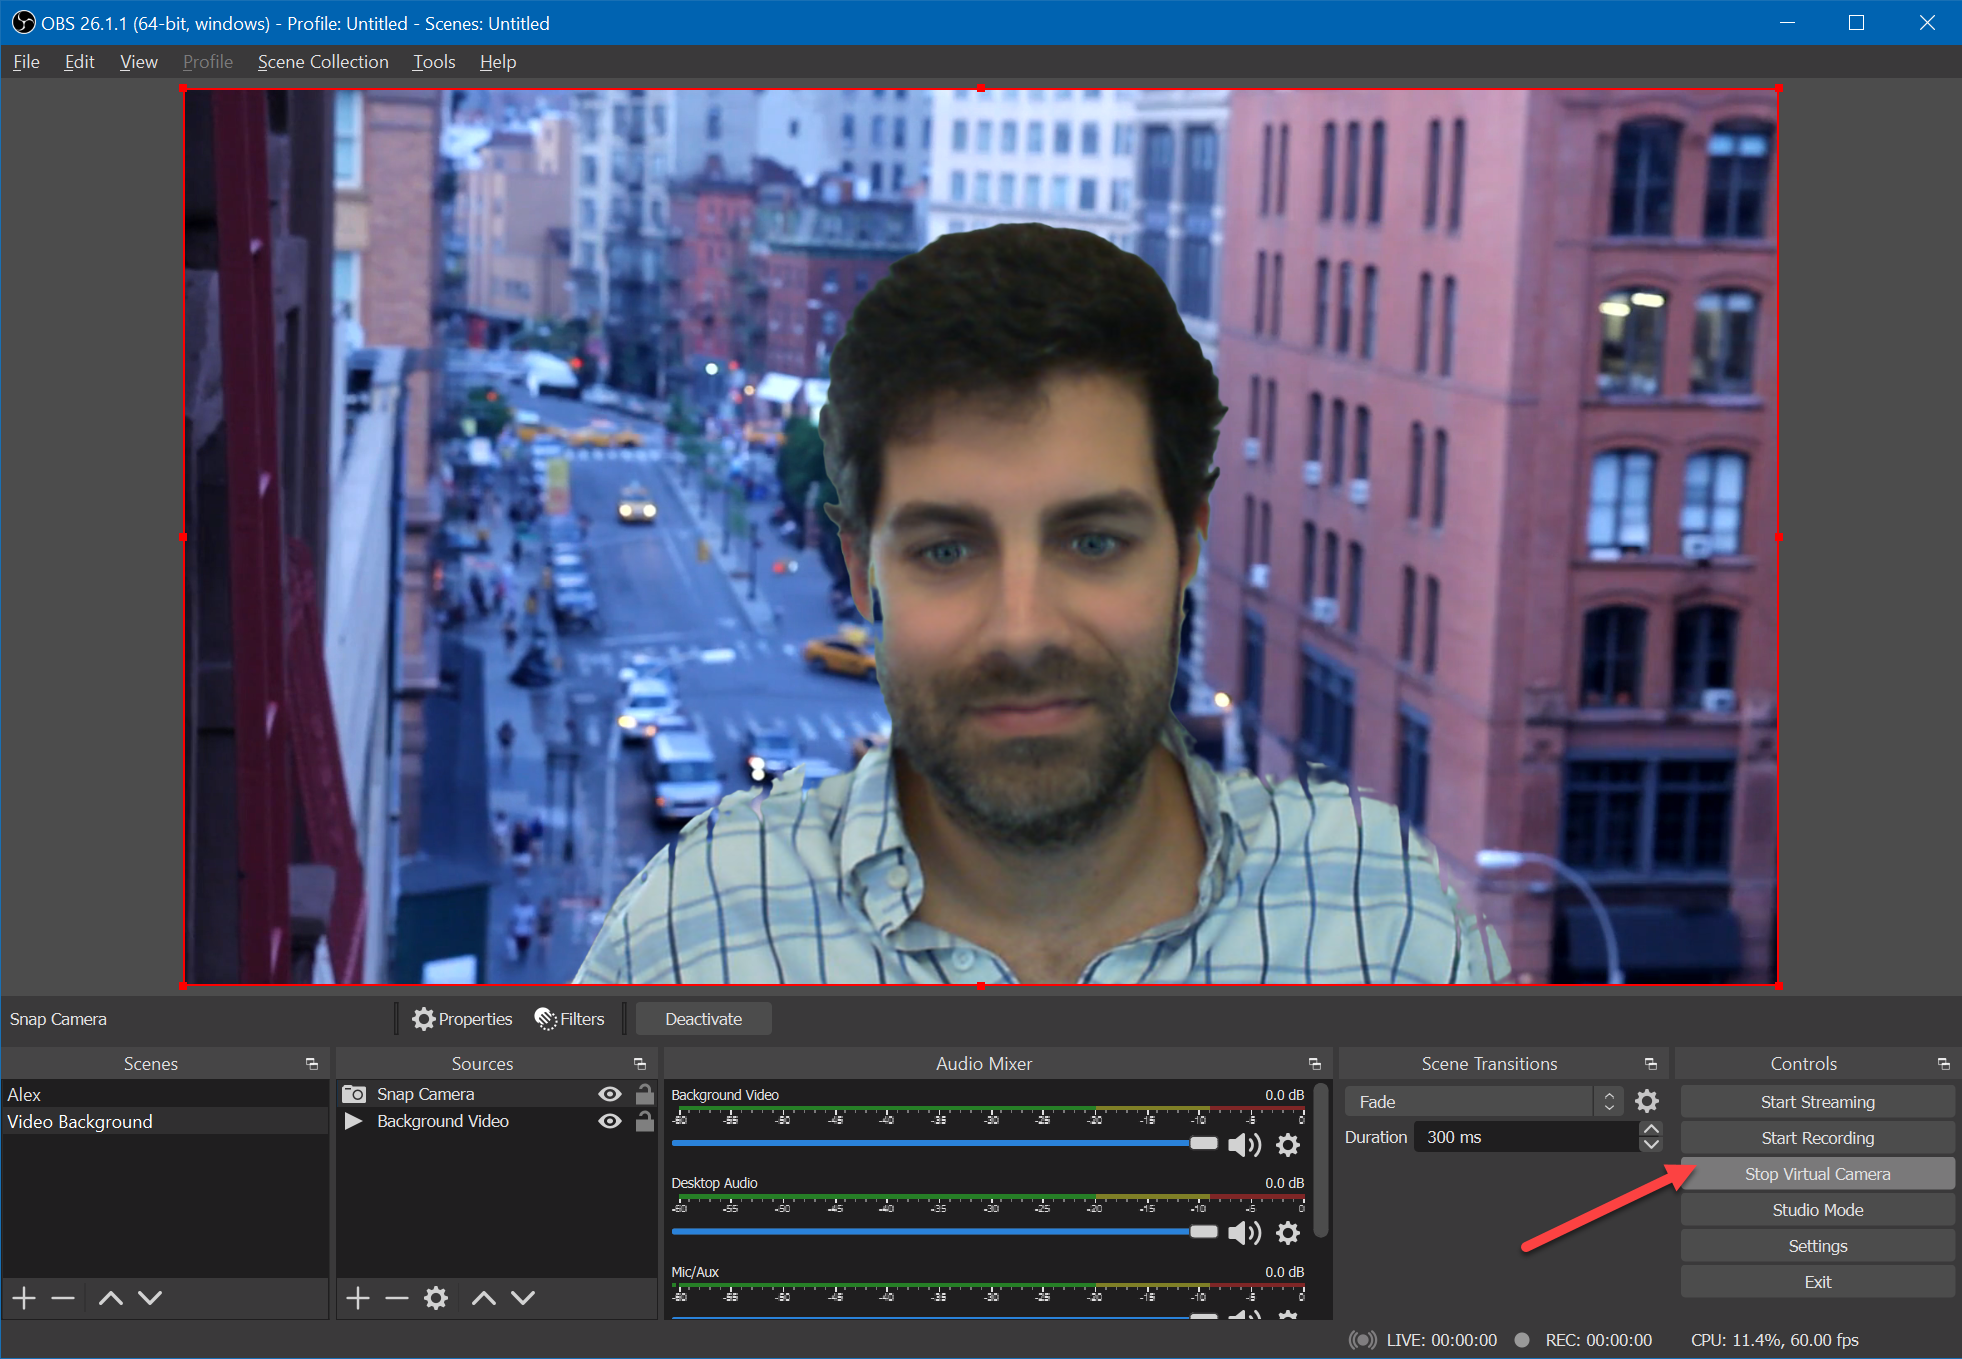
- In the sources drag the Snap Camera to the first position to make the camera capture visible on top of the video
- In the controls section click in Start Virtual Camera
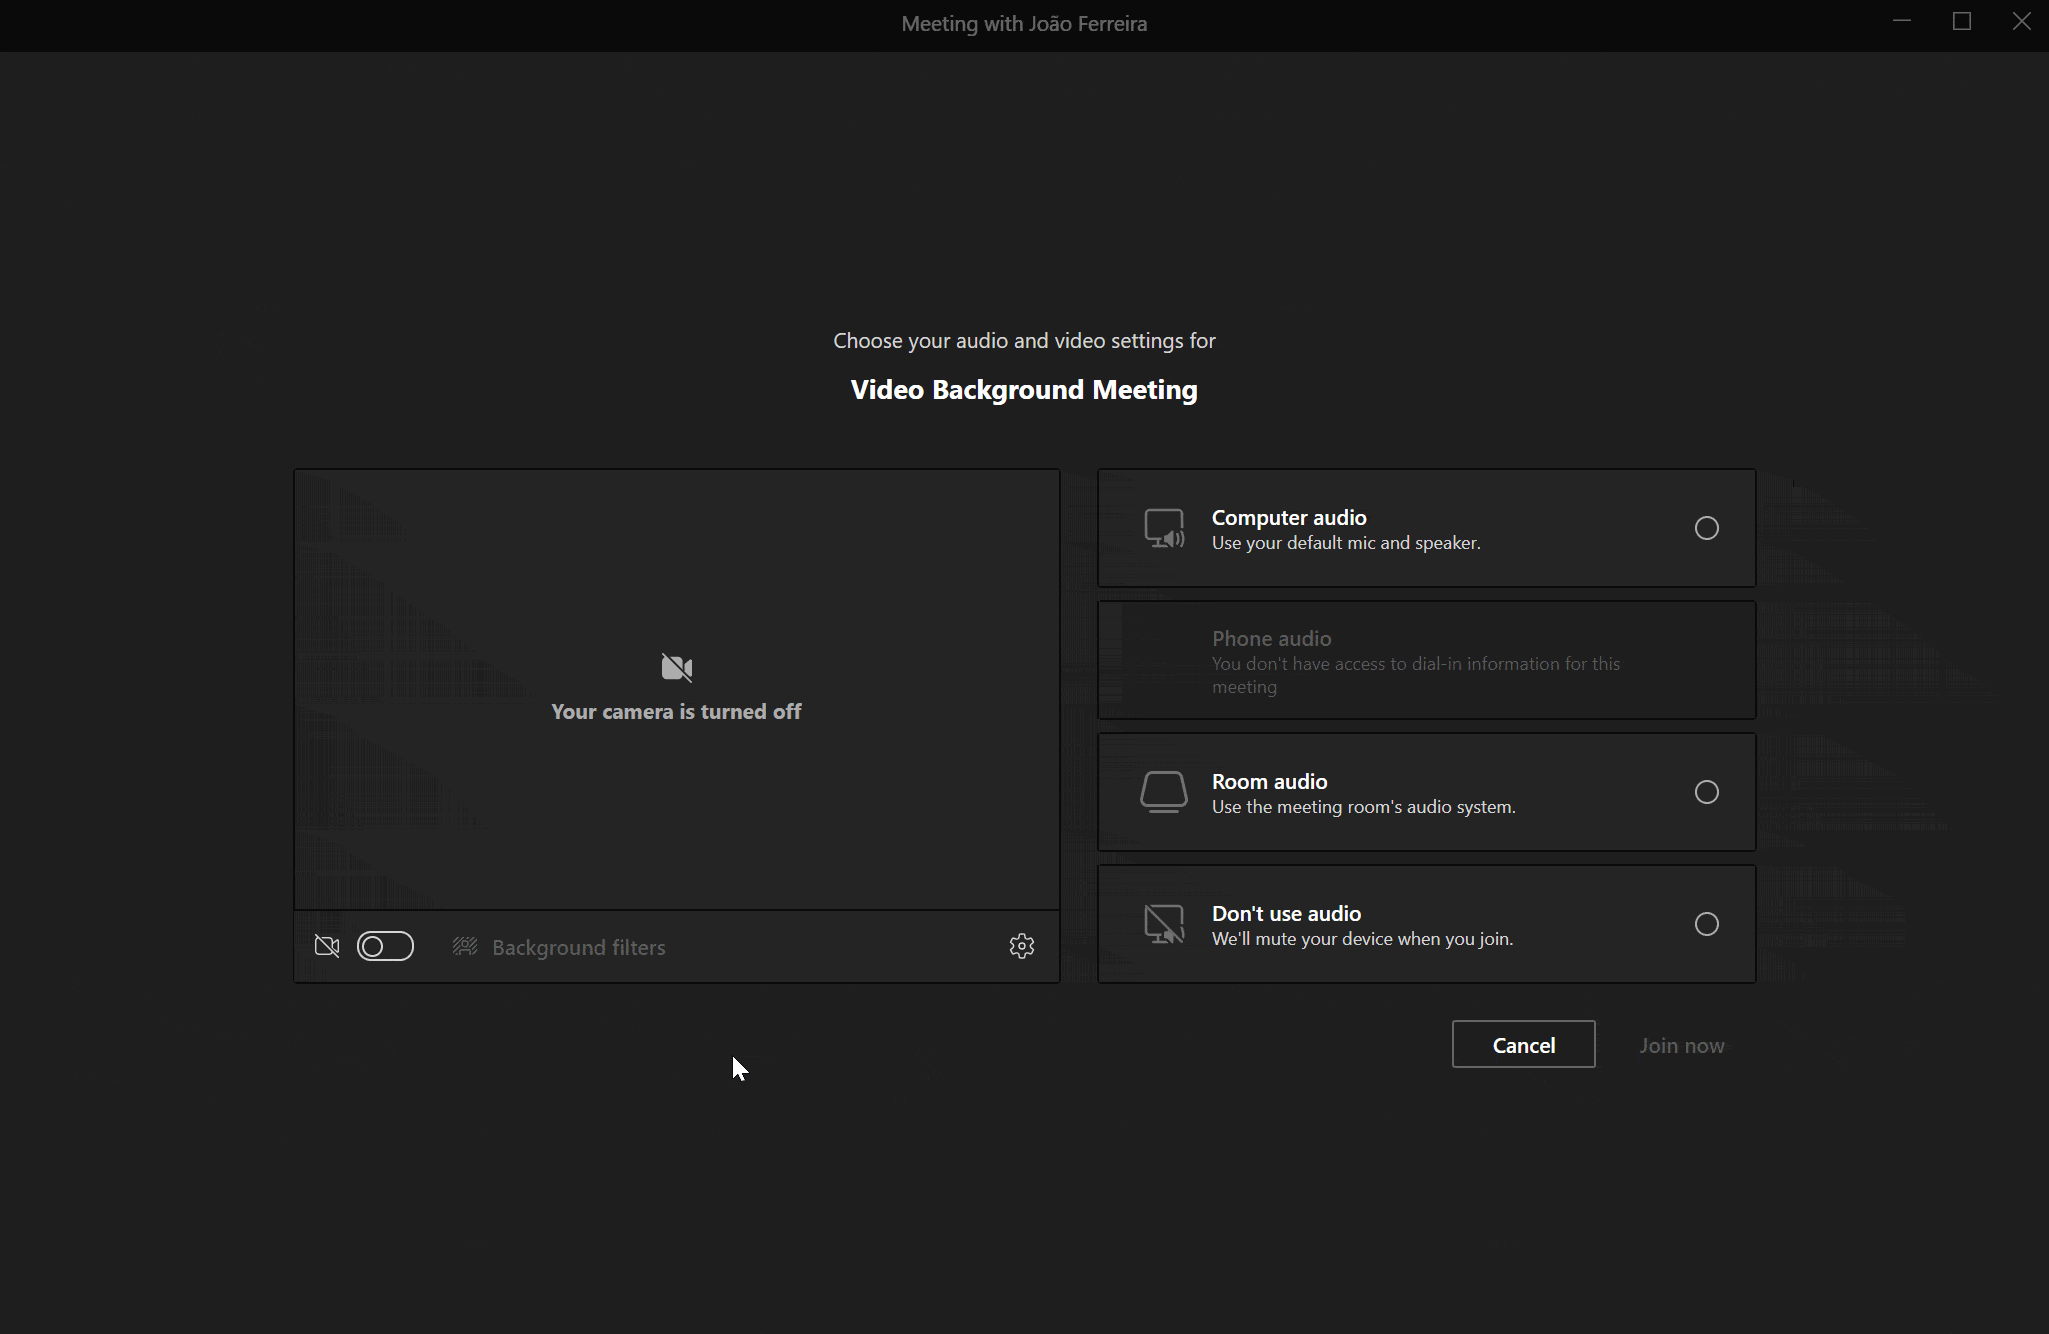
With this configuration done the last step is select the OBS virtual camera in the join screen in Microsoft Teams, so before joining your next meeting make sure you do it as shown in the following animation.


November 18, 2021
Hi Joao
interesting, but i guess you have Snap Cam and OBS installed on same PC as Team?
in my situation Team in on my corporate Laptop and we are not allowed to install programs.
I already have an HDMI to USB dongle were i use my Tandberg HDMI cam as my 4th cam on my laptop.
So if i move my HDMI cam to my PC with OBS and SnapCam and feed the output of OBS back in my Corporate PC then i guess it should work.
What to you think?
I will try it anyway.
Again thank for all the info here.
November 26, 2021
Hi Daniel,
I think it should work without issues, let me know how it went as it is an interesting scenario.